Getting started with Deriv begins with one simple step: creating your account. Whether you’re new to online trading or switching over from another platform, the sign-up process is quick, requires minimal information upfront, and gets you trading in just a few minutes. In this guide, we’ll walk you through exactly how to create a Deriv account, step by step, so you can get set up correctly from the very first click.You will soon be requested toprovide some personal information. Read Financial Action Task Force page the to understand the need for KYC and some of the interntional standards that apply around Financial Crime.
Simply click here to start the process of creating your Deriv Account. Very soon you will be making your first deposit so make sure to read How to deposit into Deriv.

Step 1: Go to the Deriv Sign-Up Page
Open your browser and go to deriv.com. On the homepage, you’ll see a “Sign up” button in the top right corner. Click on it to start your Deriv account registration.

Step 2: Choose How to Sign Up for Deriv
Deriv gives you a few ways to create an account:
- Email address – enter your email and create a password
- Google account – sign up instantly using your existing Google login
- Apple ID – available if you’re using an Apple device
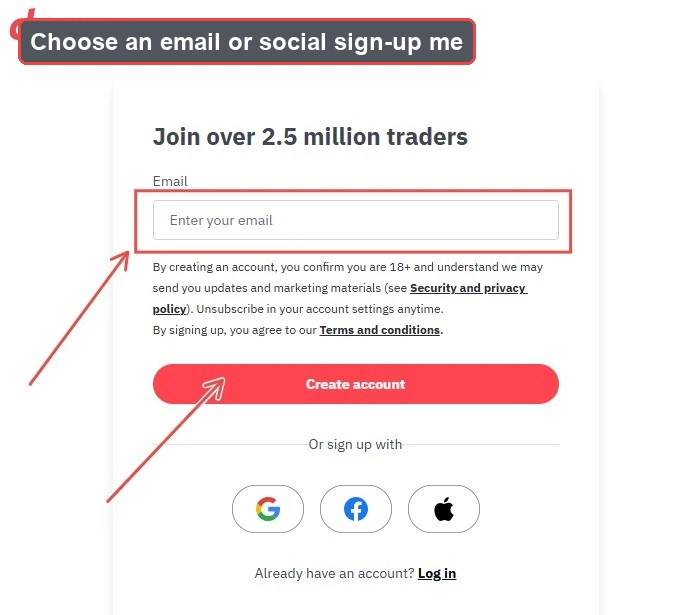
If you’re using email, make sure to use one you check regularly, since Deriv will send a verification link there.
Step 3: Verify Your Deriv Account Email
After entering your email and password, check your inbox for a message from Deriv. Open the email and click the verification link. This confirms your email address and takes you back to the platform to continue setup.

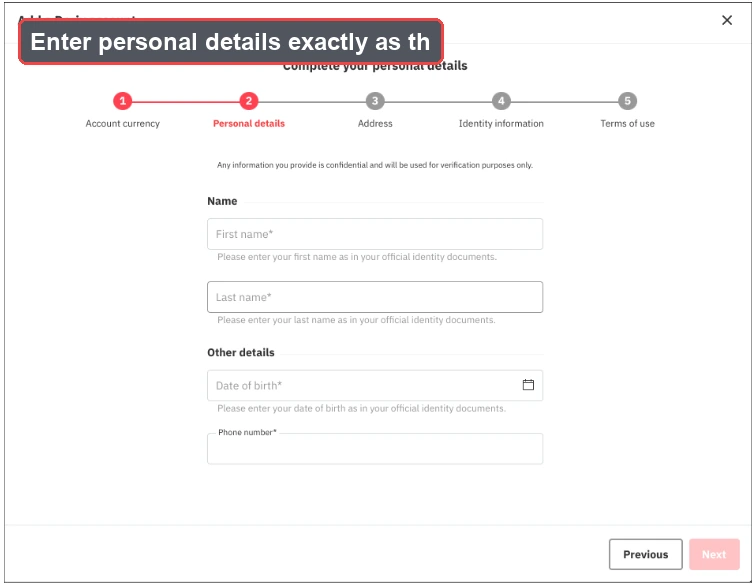
Step 4: Complete Your Deriv Registration Details
Next, you’ll be asked for some basic information, including:
- Full name
- Date of birth
- Country of residence
- Phone number
Double-check that everything matches your official ID documents, since this information will be used later if you need to verify your account.
Step 5: Choose Your Deriv Account Currency
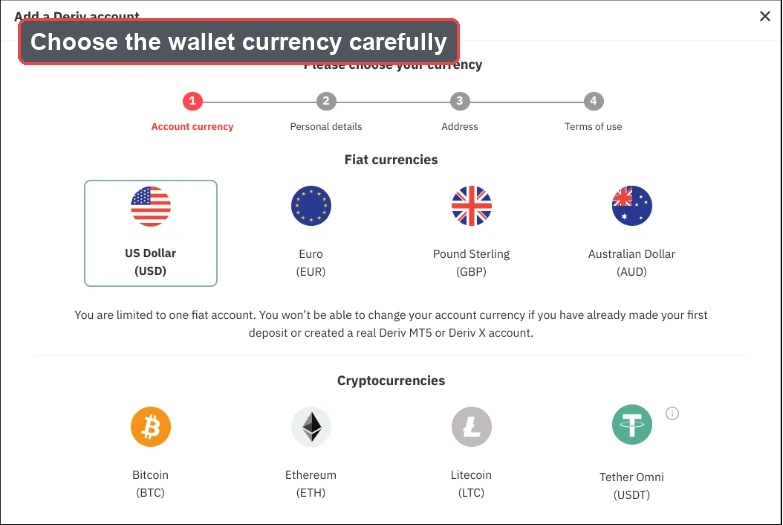
You’ll be asked to choose a currency for your account. This is worth pausing on, since it typically can’t be changed later. Pick the currency you’re most likely to use for deposits and withdrawals.
Step 6: Review and Confirm Your New Deriv Account
Once your details are in, you’ll see a summary screen. Take a moment to review everything, then click “Complete” or “Submit” to finish creating your account.

Your Deriv Account Is Ready
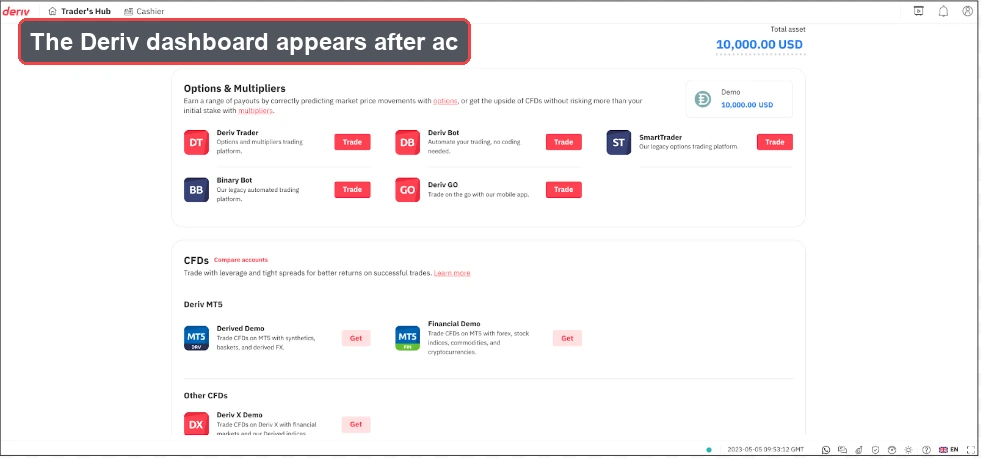
That is it. Your Deriv account is now live. You’ll land on your account dashboard, which is where you’ll manage everything going forward, from account settings to deposits.
A couple of quick tips before you move on:
- Keep your login details somewhere safe.
- You may be prompted to complete identity verification before you can deposit or withdraw. This is a standard step for account security. Read our guide How to verify your Deriv Account.
A growing number of traders and non-traders are adding an income stream by simply joining the Deriv Partner Program. By simply helping new traders to onboard, one qualifies to earn commissions from Deriv.
FAQ: Creating a Deriv Account
Is it free to create a Deriv account?
Yes, signing up for Deriv doesn’t cost anything. You only fund your account when you’re ready to make a deposit.
Can I sign up for Deriv with Google or Apple?
Yes. Alongside email registration, Deriv lets you create an account instantly using your Google or Apple ID.
Can I change my Deriv account currency later?
No, the currency you choose during sign-up typically becomes permanent for that account, so pick carefully.
Do I need to verify my identity to open a Deriv account?
You can register without full verification, but you’ll usually need to verify your identity before withdrawing funds.