Before you can start trading, withdrawing funds, or unlocking higher limits on Deriv, there’s one essential step you can’t skip: verifying your account. Account verification helps keep the platform secure, ensures compliance with financial regulations, and protects your funds from unauthorized access. While it might seem like an extra hurdle, the process is quick and straightforward once you know what’s required. In this guide, we’ll walk you through exactly how to verify your Deriv account, step by step, so you can get fully set up without delays. Depending on your country, there are various regulatory authorities that determine how your account is verified. To understand the international standards you can look at Financial Action Task Force for in depth information.
If you have not yet opened a Deriv Account at all you can do that first here before proceeding. In our guide How to create a Deriv Account we show you the exact step by step methodology to create your account.
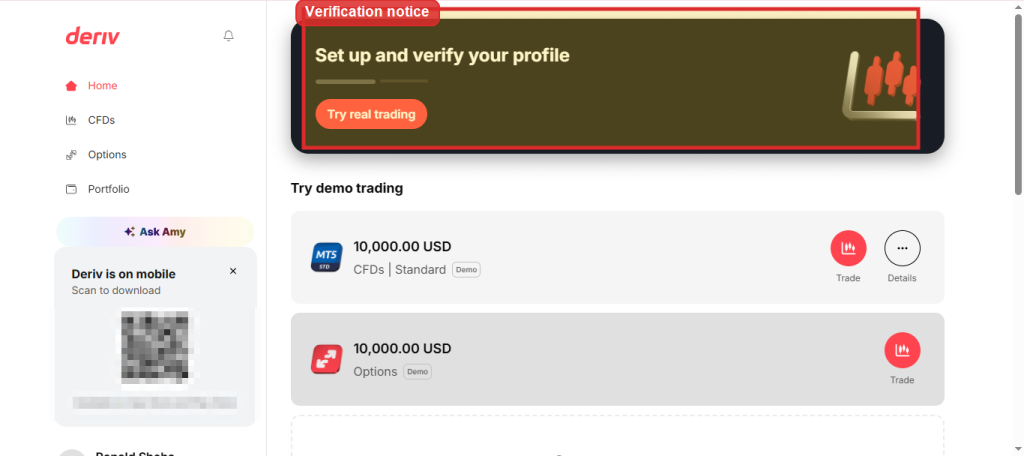
Step 1: Go to Your Deriv Account Settings
Log into your Deriv account and make sure you are on the home section of your dashboard. Click try real trading as shown in the image above. This will initiate the verification process starting from where you left off during the registration of your account. Follow the instructions by providing the necessary information.
Step 2: Open the Proof of Identity Section
As you fill out the required fields you will eventually get to the step (step3/6) where you will be asked to submit an ID type.
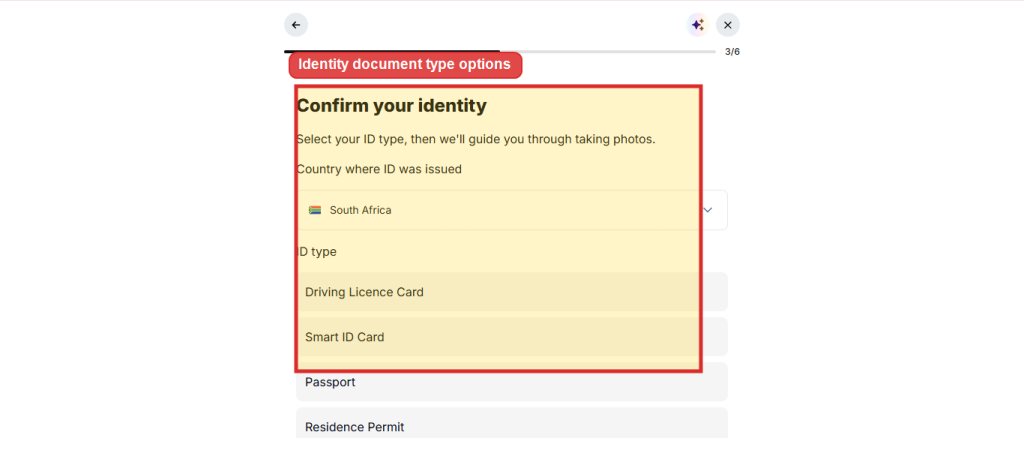
Step 3: Submit Your Proof of Identity Document
Choose one of the accepted identity documents:
- National ID card
- Passport
- Driving licence

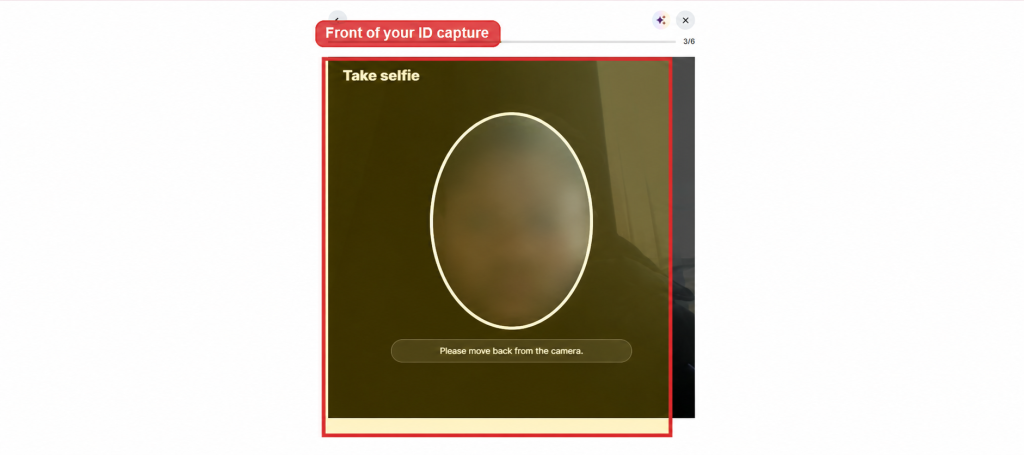
Immediately after selecting and submitting your ID type you will be prompted to take a selfie. After submitting your selfie you will be required to display the front of your ID and the back of your ID in front of the camera. Once submitted successfully you will be notified.
Step 4: Open the Proof of Address Section
Next, go to the “Proof of address” tab. Deriv requires this to confirm where you live before allowing withdrawals above a certain threshold.
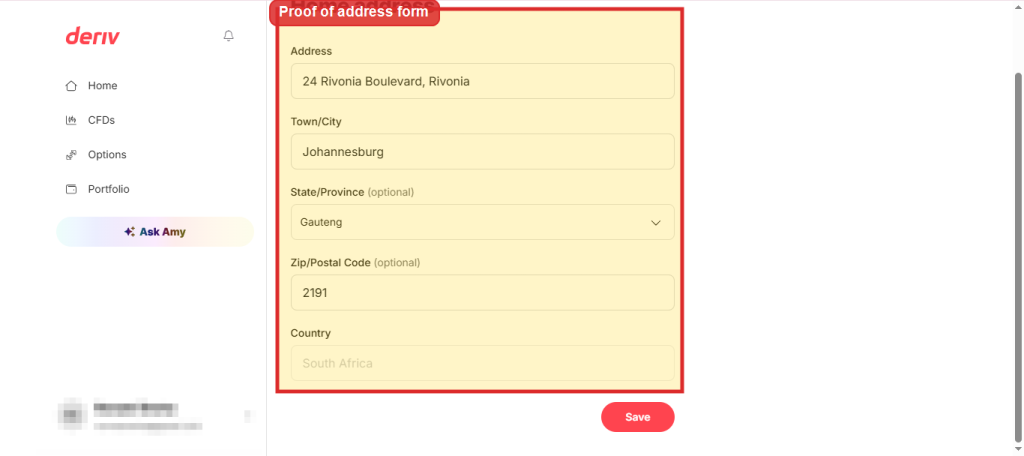
Step 5: Submit Your Proof of Address Document
Accepted documents usually include:
- Utility bill (water, electricity, etc.)
- Bank statement
- Government-issued letter
The document should be dated within the last six months and clearly show your name and address.
Step 6: Wait for Deriv to Review Your Documents
Once submitted, your documents go into review. This usually takes a short while, and you’ll see the status update in your Account Settings under each tab for instance, pending, verified, or if there’s an issue, a note on what needs fixing.
You’re Verified
Once both proof of identity and proof of address are approved, your Deriv account is fully verified. You’ll be able to deposit and withdraw without the limits applied to unverified accounts.
Another way individuals are earning from Deriv is through the Deriv Partner Program. Anyone can join and become an affiliate and start earning from day one without placing a single trade.
FAQ: Verifying Your Deriv Account
Do I have to verify my Deriv account immediately after signing up? Not always. You can usually deposit small amounts and explore the platform first, but verification is required before larger deposits or any withdrawal.
How long does Deriv account verification take? Review times vary, but most submissions are processed within a day or two. You can track the status directly in your Account Settings.
What if my proof of identity or address is rejected? Deriv will tell you the reason in your Account Settings, such as a blurry image or mismatched details, and you can simply re-upload a corrected document.
Can I use the same document for both proof of identity and proof of address? No. A passport or ID card only counts as proof of identity — you’ll need a separate document, like a utility bill, for proof of address.